Search This Blog

Thursday 3 December 2015

IBM Containers running Spring Boot Applications with IBM Bluemix

There is now a new command line plugin for IBM containers on Bluemix so you can push and run docker images using CF CLI itself. The steps below show you how to set this up and I use a basic spring boot application as a docker image to test this out.

Steps

Take a note of the docker local host IP. In this example it was as follows, as I test my docker image on my laptop prior to pushing it to Bluemix.

-> docker is configured to use the default machine with IP 192.168.99.100

1. Install the latest CF command line, I used the following version.

pasapicella@pas-macbook-pro:~/bluemix_apps/CONTAINERS/ibm-containers/gs-rest-service/complete$ cf --version
cf version 6.14.0+2654a47-2015-11-18


https://github.com/cloudfoundry/cli

2. Install IBM Containers Cloud Foundry plug-in

pasapicella@pas-macbook-pro:~$ cf install-plugin https://static-ice.ng.bluemix.net/ibm-containers-mac

**Attention: Plugins are binaries written by potentially untrusted authors. Install and use plugins at your own risk.**

Do you want to install the plugin https://static-ice.ng.bluemix.net/ibm-containers-mac? (y or n)> y

Attempting to download binary file from internet address...
9314192 bytes downloaded...
Installing plugin /var/folders/rj/5r89y5nd6pd4c9hwkbvdp_1w0000gn/T/ibm-containers-mac...
OK
Plugin IBM-Containers v0.8.788 successfully installed.


Note: Default plugin directory as follows

$HOME/.cf/plugins


3. Login to IBM Containers

pasapicella@pas-macbook-pro:~/bluemix_apps/CONTAINERS$ cf ic login
Client certificates are being retrieved from IBM Containers...
Client certificates are being stored in /Users/pasapicella/.ice/certs/...
Client certificates are being stored in /Users/pasapicella/.ice/certs/containers-api.ng.bluemix.net/0bcbcada-bd11-4372-b416-955dff3078a1...
OK
Client certificates were retrieved.

Deleting old configuration file...
Checking local Docker configuration...
OK

Authenticating with registry at host name registry.ng.bluemix.net
OK
Your container was authenticated with the IBM Containers registry.
Your private Bluemix repository is URL: registry.ng.bluemix.net/apples

You can choose from two ways to use the Docker CLI with IBM Containers:

Option 1: This option allows you to use "cf ic" for managing containers on IBM Containers while still using the Docker CLI directly to manage your local Docker host.
    Use this Cloud Foundry IBM Containers plug-in without affecting the local Docker environment:

    Example Usage:
    cf ic ps
    cf ic images

Option 2: Use the Docker CLI directly. In this shell, override the local Docker environment to connect to IBM Containers by setting these variables. Copy and paste the following commands:
    Note: Only Docker commands followed by (Docker) are supported with this option.

     export DOCKER_HOST=tcp://containers-api.ng.bluemix.net:8443
     export DOCKER_CERT_PATH=/Users/pasapicella/.ice/certs/containers-api.ng.bluemix.net/0bcbcada-bd11-4372-b416-955dff3078a1
     export DOCKER_TLS_VERIFY=1

    Example Usage:
    docker ps
    docker images
4. View docker images

pasapicella@pas-macbook-pro:~/bluemix_apps/CONTAINERS$ cf ic images
REPOSITORY                                        TAG                 IMAGE ID            CREATED             VIRTUAL SIZE
registry.ng.bluemix.net/ibm-mobilefirst-starter   latest              5996bb6e51a1        6 weeks ago         770.4 MB
registry.ng.bluemix.net/ibm-node-strong-pm        latest              ef21e9d1656c        8 weeks ago         528.7 MB
registry.ng.bluemix.net/ibmliberty                latest              2209a9732f35        8 weeks ago         492.8 MB
registry.ng.bluemix.net/ibmnode                   latest              8f962f6afc9a        8 weeks ago         429 MB
registry.ng.bluemix.net/apples/etherpad_bluemix   latest              131fd7a39dff        11 weeks ago        570 MB


5. Clone application to run as docker image

$ git clone https://github.com/spring-guides/gs-rest-service.git

6. Create a file called Dockerfile as follows in the "complete" directory

pasapicella@pas-macbook-pro:~/bluemix_apps/CONTAINERS/ibm-containers/gs-rest-service/complete$ cat Dockerfile
FROM java:8
VOLUME /tmp
ADD target/gs-rest-service-0.1.0.jar app.jar
RUN bash -c 'touch /app.jar'
ENTRYPOINT ["java","-Djava.security.egd=file:/dev/./urandom","-jar","/app.jar"]


7. Package the demo

$ mvn package

8. Build docker image

pasapicella@pas-macbook-pro:~/bluemix_apps/CONTAINERS/ibm-containers/gs-rest-service/complete$ docker build -t gs-rest-service .
Sending build context to Docker daemon 13.44 MB
Step 1 : FROM java:8
8: Pulling from library/java
1565e86129b8: Pull complete
a604b236bcde: Pull complete
5822f840e16b: Pull complete
276ac25b516c: Pull complete
5d32526c1c0e: Pull complete
0d61f7a71c59: Pull complete
16952eac0a64: Pull complete
2fb3388c8597: Pull complete
ca603b247c8e: Pull complete
1785f2bc7c99: Pull complete
40e61a6ae215: Pull complete
32f541968fe6: Pull complete
Digest: sha256:52a1b487ed34f5a76f88a336a740cdd3e7b4486e264a3e69ece7b96e76d9f1dd
Status: Downloaded newer image for java:8
 ---> 32f541968fe6
Step 2 : VOLUME /tmp
 ---> Running in 030f739777ac
 ---> 22bf0f9356a1
Removing intermediate container 030f739777ac
Step 3 : ADD target/gs-rest-service-0.1.0.jar app.jar
 ---> ac590c46b73b
Removing intermediate container 9790c39eb1f7
Step 4 : RUN bash -c 'touch /app.jar'
 ---> Running in e9350ddebb75
 ---> 697d245c6afb
Removing intermediate container e9350ddebb75
Step 5 : ENTRYPOINT java -Djava.security.egd=file:/dev/./urandom -jar /app.jar
 ---> Running in 42fc22473930
 ---> df853abfea57
Removing intermediate container 42fc22473930
Successfully built df853abfea57


9. Run locally

pasapicella@pas-macbook-pro:~/bluemix_apps/CONTAINERS/ibm-containers/gs-rest-service/complete$ docker run --name gs-rest-service -p 80:8080 -d -t gs-rest-service
a392aa15da81fb4ca6c16a6307e0bd1c6b22f9a046228f1fc477d3fe12e15f16


10. Test as follows

pasapicella@pas-macbook-pro:~/bluemix_apps/CONTAINERS/ibm-containers$ curl http://192.168.99.100/greeting
{"id":1,"content":"Hello, World!"}


11. PUSH TO BLUEMIX AS follows

pasapicella@pas-macbook-pro:~/bluemix_apps/CONTAINERS/ibm-containers/gs-rest-service/complete$ docker tag gs-rest-service registry.ng.bluemix.net/apples/gs-rest-service
pasapicella@pas-macbook-pro:~/bluemix_apps/CONTAINERS/ibm-containers/gs-rest-service/complete$ docker push registry.ng.bluemix.net/apples/gs-rest-service
The push refers to a repository [registry.ng.bluemix.net/apples/gs-rest-service] (len: 1)
Sending image list
Pushing repository registry.ng.bluemix.net/apples/gs-rest-service (1 tags)
Image 5822f840e16b already pushed, skipping
Image 276ac25b516c already pushed, skipping
Image 5d32526c1c0e already pushed, skipping
Image a604b236bcde already pushed, skipping
Image 1565e86129b8 already pushed, skipping
Image 0d61f7a71c59 already pushed, skipping
Image 2fb3388c8597 already pushed, skipping
Image 16952eac0a64 already pushed, skipping
Image ca603b247c8e already pushed, skipping
Image 1785f2bc7c99 already pushed, skipping
Image 40e61a6ae215 already pushed, skipping
Image 32f541968fe6 already pushed, skipping
22bf0f9356a1: Image successfully pushed
ac590c46b73b: Image successfully pushed
697d245c6afb: Image successfully pushed
df853abfea57: Image successfully pushed
Pushing tag for rev [df853abfea57] on {https://registry.ng.bluemix.net/v1/repositories/apples/gs-rest-service/tags/latest}


12. List all allocated IP

pasapicella@pas-macbook-pro:~/bluemix_apps/CONTAINERS/ibm-containers/gs-rest-service/complete$ cf ic ip list
Number of allocated public IP addresses:  2

IpAddress        ContainerId
134.168.13.83
134.168.15.105


13. Create a container from the uploaded image

pasapicella@pas-macbook-pro:~/bluemix_apps/CONTAINERS/ibm-containers/gs-rest-service/complete$ cf ic run -p 8080 --memory 512 --name pas-sb-container registry.ng.bluemix.net/apples/gs-rest-service:latest
b1fe3159-0c19-4d54-b0f5-cdd938618deb


14. Assign IP to container

pasapicella@pas-macbook-pro:~/bluemix_apps/CONTAINERS/ibm-containers/gs-rest-service/complete$ cf ic ip bind 134.168.13.83 pas-sb-container
OK
The IP address was bound successfully.


15. Verify it's running

pasapicella@pas-macbook-pro:~/bluemix_apps/CONTAINERS/ibm-containers/gs-rest-service/complete$ cf ic ps -a
CONTAINER ID        IMAGE               COMMAND             CREATED             STATUS                  PORTS                          NAMES
3794802b-b0c                  ""                  4 minutes ago       Running 3 minutes ago   134.168.13.83:8080->8080/tcp   pas-sb-container

16. Invoke as follows

$ curl http://134.168.13.83:8080/greeting


More Information

Plugin Reference ->

https://www.eu-gb.bluemix.net/docs/containers/container_cli_reference_cfic.html

Installing cf ci plugin ->

https://www.eu-gb.bluemix.net/docs/containers/doc/container_cli_cfic.html

Friday 20 November 2015

IBM Bluemix Secure Gateway Service with Oracle

I previously blogged about using the IBM Bluemix Secure Gateway Service as follows

http://theblasfrompas.blogspot.com.au/2015/11/ibm-bluemix-secure-gateway-service-step.html

I decided I would extend on this and Connect a Spring Boot Application to Oracle and consume Oracle data using the Secure Gateway Service.

The full demo is as follows

https://dl.dropboxusercontent.com/u/15829935/bluemix-docs/secure-gateway-oracle/index.html


Wednesday 18 November 2015

IBM Bluemix Secure Gateway Service Step by Step Demo

I created this simple step by step guide on how to use the IBM Secure Gateway Service. Very simple demo which shows how easy it is to set this up and open a world of possibilities from on premise resources directly exposed via Bluemix whether it's PUBLIC or Dedicated/LOcal Instances

https://dl.dropboxusercontent.com/u/15829935/bluemix-docs/secure-gateway/index.html


Tuesday 10 November 2015

IBM Bluemix Admin Console Command Line (CLI) Installation

The IBM Bluemix Dedicated/Local Administration Console also includes support for CLI to enable common management tasks to be performed using the Cloud Foundry Command Line by adding a plugin to enable support for it's commands.

Note: The Bluemix Admin CLI plugin requires version 6.11.2 or later.

Admin Console UI


Admin Console - Installing Command Line

The CLI to the admin console is installed as follows. The reference to this is found in your own Dedicated/Local install via a link as follows with "cli" appended to the Admin Console URL

https://opsconsole.mylocalinstance.bluemix.net/cli


pasapicella@pas-macbook
pro:~$ cf add-plugin-repo BluemixAdmin https://opsconsole.mylocalinstance.bluemix.net/cli

OK
https://opsconsole.mylocalinstance.bluemix.net/cli/list added as 'BluemixAdmin'

pasapicella@pas-macbook-pro:~$ cf install-plugin bluemix-admin-cli -r BluemixAdmin
Looking up 'bluemix-admin-cli' from repository 'BluemixAdmin'
8889440 bytes downloaded...
Installing plugin /var/folders/rj/5r89y5nd6pd4c9hwkbvdp_1w0000gn/T/bluemix-admin...
OK
Plugin BluemixAdminCLI v0.0.1 successfully installed.
pasapicella@pas-macbook-pro:~$ cf plugins
Listing Installed Plugins...
OK

…...

Finally target admin API endpoint:

pasapicella@pas-macbook-pro:~$ cf baa https://opsconsole.mylocalinstance.bluemix.net
The API endpoint has been updated to 'https://opsconsole.mylocalinstance.bluemix.net'

At this point you can now run Admin Console commands as follows. To get help issue "cf {command} --help"
 
The current supported commands are as follows:
 
bluemix-admin-api, baa                              
bluemix-admin-add-user, baau                        
bluemix-admin-remove-user, baru                     
bluemix-admin-set-organization, baso                
bluemix-admin-unset-organization, bauo              
bluemix-admin-set-quota, basq                       
bluemix-admin-add-report, baar                      
bluemix-admin-delete-report, badr                   
bluemix-admin-retrieve-report, barr                 
bluemix-admin-enable-service-plan, baesp            
bluemix-admin-disable-service-plan, badsp           
bluemix-admin-add-service-plan-visibility, baaspv   
bluemix-admin-remove-service-plan-visibility, barspv
bluemix-admin-edit-service-plan-visibilites, baespv 
bluemix-admin-set-region-access, basra              
bluemix-admin-create-organization, baco             
bluemix-admin-delete-organization, bado 


Monday 9 November 2015

Spring Security Demo with a Bootstrap Look and Feel

I decided to take the Spring Security demo at the following link , and add Bootstrap to it. In the end it's basically the same code and the Form Based Login will accept one user "pas/welcome1".

http://spring.io/guides/gs/securing-web/

Here is the updated demo with Bootstrap added to the UI pages. You can deploy this to Bluemix using the "Deploy to Bluemix" directly from GitHub and it will as you to Sing into IBM devOps prior to deploying it directly into your Bluemix Environment.

https://github.com/papicella/SpringBootSecurityBootstrap

Saturday 10 October 2015

IBM Bluemix - Spring Boot Elasticsearch Repositories demo

I decided to take the Elasticsearch repositories as part of the Spring Data project for a test drive. The Spring boot Elasticsearch repositories are described in the link below.

http://docs.spring.io/spring-data/elasticsearch/docs/current/reference/html/#elasticsearch.repositories

In this example I create a basic Spring Boot application using Elasticsearch, Web, Rest Repositories along with Thymeleaf / Bootstrap as the view pages. The code for this is on GitHub which also provides the "Deploy to Bluemix" button to deploy to your own instance of this application into your own Bluemix accout.

https://github.com/papicella/SpringBootElasticSearch


Like all Spring Data Repositories you can create an interface and be given basic CRUD operations to the Elastisearch DOCUMENT as shown below.

EmployeeRepository.java
 
package pas.au.ibm.bluemix.elastic;

import org.springframework.data.elasticsearch.repository.ElasticsearchRepository;

import java.util.List;

public interface EmployeeRepository extends ElasticsearchRepository<Employee, String>
{
    public List<Employee> findByFirstNameContaining(String firstName);
} 

Employee.java
  
package pas.au.ibm.bluemix.elastic;

import org.springframework.data.annotation.Id;
import org.springframework.data.elasticsearch.annotations.Document;

@Document(indexName = "employee", type = "employee", shards = 1, replicas = 0, refreshInterval = "-1")
public class Employee
{
    @Id
    private String id;
    private String firstName;
    private String lastName;
    private String job;
    private int deptNo;

    public Employee()
    {
    }

....

If you don't have a IBM DevOps Jazzhub account the manifest.yml can be used if you clone the project, and compile it using maven with "mvn package". Be sure to alter the application name / host to be a unique name within Bluemix.

applications:
 - name: pas-sb-elastic
   memory: 450M
   path: ./target/SpringBootElasticSearch-0.0.1-SNAPSHOT.jar
   instances: 1
   host: pas-sb-elastic
   buildpack: java_buildpack
   domain: mybluemix.net


Example Deployment

pasapicella@pas-macbook-pro:~/ibm/DemoProjects/spring-starter/jazzhub/SpringBootElasticSearch$ cf push
Using manifest file /Users/pasapicella/ibm/DemoProjects/spring-starter/jazzhub/SpringBootElasticSearch/manifest.yml

Creating app pas-sb-elastic in org pasapi@au1.ibm.com / space dev as pasapi@au1.ibm.com...
OK

Using route pas-sb-elastic.mybluemix.net
Binding pas-sb-elastic.mybluemix.net to pas-sb-elastic...
OK

Uploading pas-sb-elastic...
Uploading app files from: /Users/pasapicella/ibm/DemoProjects/spring-starter/jazzhub/SpringBootElasticSearch/target/SpringBootElasticSearch-0.0.1-SNAPSHOT.jar
Uploading 1M, 133 files
Done uploading
OK

Starting app pas-sb-elastic in org pasapi@au1.ibm.com / space dev as pasapi@au1.ibm.com...
-----> Downloaded app package (35M)
-----> Java Buildpack Version: v3.0 | https://github.com/cloudfoundry/java-buildpack.git#3bd15e1
-----> Downloading Open Jdk JRE 1.8.0_60 from https://download.run.pivotal.io/openjdk/trusty/x86_64/openjdk-1.8.0_60.tar.gz (2.7s)
       Expanding Open Jdk JRE to .java-buildpack/open_jdk_jre (1.7s)
-----> Downloading Spring Auto Reconfiguration 1.10.0_RELEASE from https://download.run.pivotal.io/auto-reconfiguration/auto-reconfiguration-1.10.0_RELEASE.jar (0.9s)

-----> Uploading droplet (79M)

0 of 1 instances running, 1 starting
1 of 1 instances running

App started


OK

App pas-sb-elastic was started using this command `SERVER_PORT=$PORT $PWD/.java-buildpack/open_jdk_jre/bin/java -cp $PWD/.:$PWD/.java-buildpack/spring_auto_reconfiguration/spring_auto_reconfiguration-1.10.0_RELEASE.jar -Djava.io.tmpdir=$TMPDIR -XX:OnOutOfMemoryError=$PWD/.java-buildpack/open_jdk_jre/bin/killjava.sh -Xmx329386K -Xms329386K -XX:MaxMetaspaceSize=64M -XX:MetaspaceSize=64M -Xss975K org.springframework.boot.loader.JarLauncher`

Showing health and status for app pas-sb-elastic in org pasapi@au1.ibm.com / space dev as pasapi@au1.ibm.com...
OK

requested state: started
instances: 1/1
usage: 450M x 1 instances
urls: pas-sb-elastic.mybluemix.net
last uploaded: Sat Oct 10 10:20:52 UTC 2015
stack: cflinuxfs2
buildpack: java_buildpack

     state     since                    cpu    memory           disk           details
#0   running   2015-10-10 09:22:42 PM   0.3%   425.1M of 450M   158.1M of 1G


The application is currently deployed and is accessible at the URL below.

http://pas-sb-elastic.mybluemix.net/


More Information

http://docs.spring.io/spring-data/elasticsearch/docs/current/reference/html/#elasticsearch.repositories

https://www.elastic.co/

Tuesday 6 October 2015

IBM Bluemix - Specify only Liberty buildpack features you require

I am more often then not using spring boot applications on IBM Bluemix and most of what I need is packaged with the application from JPA or JDBC, drivers, Rest etc. Of course with IBM Bluemix we can specify which build pack we wish to use but by default for java applications LIberty is used.

When a stand-alone application is deployed, a default Liberty configuration is provided for the application. The default configuration enables the following Liberty features:
  • beanValidation-1.1
  • cdi-1.2
  • ejbLite-3.2
  • el-3.0
  • jaxrs-2.0
  • jdbc-4.1
  • jndi-1.0
  • jpa-2.1
  • jsf-2.2
  • jsonp-1.0
  • jsp-2.3
  • managedBeans-1.0
  • servlet-3.1
  • websocket-1.1
  • icap:managementConnector-1.0
  • appstate-1.0
Here is how I strip out some of what isn't required in my Liberty runtime container to a bare minimal of what I need.

manifest.yml

applications:
 - name: pas-speedtest
   memory: 512M
   instances: 1
   path: ./demo-0.0.1-SNAPSHOT.jar
   host: pas-speedtest
   domain: mybluemix.net
   env:
     JBP_CONFIG_LIBERTY: "app_archive: {features: [jsp-2.3, websocket-1.1, servlet-3.1]}"


 More Information

https://www.ng.bluemix.net/docs/starters/liberty/index.html#optionsforpushinglibertyapplications


Thursday 1 October 2015

IBM Bluemix - Triggerring backing service creation from "Deploy to Bluemix" button

I recently posted about the "Deploy to Bluemix" button which will automatically deploy an application into IBM Bluemix from a single click.

http://theblasfrompas.blogspot.com.au/2015/09/adding-deploy-to-bluemix-button-to-my.html

If the application requires backing services they can automatically be created using the"declared-services" tag as shown below. Declared services are a manifest extension, which creates or looks for the required or optional services that are expected to be set up before the app is deployed, such as a data cache service. You can find a list of the eligible Bluemix services, labels, and plans by using the CF Command Line Interface and running cf marketplace

manifest.yml

declared-services:
  redis-session:
    label: rediscloud
    plan: 30mb
applications:
 - name: pas-sbsessions
   memory: 512M
   instances: 2
   path: ./target/SpringBootHTTPSession-0.0.1-SNAPSHOT.jar
   host: pas-sbsessions
   domain: mybluemix.net
   buildpack: java_buildpack
   services:
    - redis-session


Note: Declared services is an IBM extension of the standard Cloud Foundry manifest format. This extension might be revised in a future release as the feature evolves and improves.

Tuesday 15 September 2015

Adding the "Deploy to Bluemix" Button to my Bluemix Applications in GitHub

Not before time I finally added my first "Deploy to Bluemix" button on my GitHub projects for Bluemix applications. The screen shot below shows this for the Spring Session - Spring Boot Portable Cloud Ready HTTP Session demo.


Here is what it looks like when I do deploy this using the "Deploy to Bluemix" button and requires me to log in to IBM Bluemix. What happens when you use this button it adds the prohect code via FORK to your own DevOps projects , adds a pipeline to compile/deploy the code and finally deploys it as you Expect it to do.


More Information

https://developer.ibm.com/devops-services/2015/02/18/share-code-new-deploy-bluemix-button/

Thursday 10 September 2015

Spring Session - Spring Boot application for IBM Bluemix

The following guide shows how to use Spring Session to transparently leverage Redis to back a web application’s HttpSession when using Spring Boot.

http://docs.spring.io/spring-session/docs/current/reference/html5/guides/boot.html

The demo below is a simple Spring Boot / Thymeleaf/ Bootstrap application to test Session replication using Spring Session - Spring Boot within IBM Bluemix. Same demo will run on Pivotal Cloud Foundry as well.

IBM DevOps URL ->

https://hub.jazz.net/project/pasapples/SpringBootHTTPSession/overview

Sample Project on GitHub ->

https://github.com/papicella/SpringBootHTTPSession


More Information

The Portable, Cloud-Ready HTTP Session
https://spring.io/blog/2015/03/01/the-portable-cloud-ready-http-session

Wednesday 2 September 2015

Integrating Telstra Public WIFI API into Bluemix

I previously blogged about Integrating Telstra Public SMS Api as shown below.

http://theblasfrompas.blogspot.co.nz/2015/08/integrating-telstra-public-sms-api-into.html

Here I show how I integrated Telstra Public WIFI Api into IBM Bluemix. This Api from Telstra is documented as follows. You need to register on http://t.dev to get the credentials to use thier API which I have previously done which then enables me to integrate it onto Bluemix

https://dev.telstra.com/content/wifi-api

Once again here is the Api Within the Bluemix Catalog, these screen shots show the Api has been added to the Bluemix Catalog which can then be consumed as a service.


Finally here is a Web based application using Bootstrap so it renders quite well on mobile devices as well which allows you to enter your Latitidue, Longitude and Radius to find Telstra WIFI Hotspots using the Telstra WIFI Api on IBM Bluemix

http://pas-telstawifiapi.mybluemix.net/


More Information

Visit http://bluemix.net to get started

Friday 28 August 2015

Integrating Telstra Public SMS API into Bluemix

In the post below I will show how I integrated Telstra public SMS Api into my Bluemix catalog to be consumed as a service. This was all done from Public Bluemix using the Cloud Integration Service.

Step 1 - Create a T.DEV account

In order to get started you need to create an account on http://dev.telstra.com in order to be granted access to the SMS API. Once access is granted you need to create an application which enables you to add/manage Telstra API keys as shown below.

1.1 Create an account an http://dev.telstra.com

1.2. Once done you should have something as follows which can take up to 24 hours to get approved as shown by the "approved" icon


Step 2 - Test the SMS Telstra API

At this point we want to test the Telstra SMS API using a script, this ensures it's working before we proceed to Integrating it onto Bluemix.

2.1. Create a script called setup.sh as follows

#Obtain these keys from the Telstra Developer Portal
APP_KEY="yyyy-key"
APP_SECRET="yyyy-secret"

curl "https://api.telstra.com/v1/oauth/token?client_id=$APP_KEY&client_secret=$APP_SECRET&grant_type=client_credentials&scope=SMS"

2.2. Edit the script above to use your APP_KEY and APP_SECRET values from the Telstra Developer Portal

2.3. Run as shown below


pas@Pass-MBP:~/ibm/customers/telstra/telstra-apis/test$ ./setup.sh
{ "access_token": "xadMkPqSAE0VG6pSGEi6rHA5vqYi", "expires_in": "3599" }

2.4. Make a note of the token key returned, you will need this to send an SMS message
2.5. Create a script called "sendsms.sh" as shown below.


# * Recipient number should be in the format of "04xxxxxxxx" where x is a digit
# * Authorization header value should be in the format of "Bearer xxx" where xxx is access token returned
# from a previous GET https://api.telstra.com/v1/oauth/token request.
RECIPIENT_NUMBER=0411151350
TOKEN=token-key

curl -H "Content-Type: application/json" \
-H "Authorization: Bearer $TOKEN" \
-d "{\"to\":\"$RECIPIENT_NUMBER\", \"body\":\"Hello, pas sent this message from telstra SMS api!\"}" \
"https://api.telstra.com/v1/sms/messages"

2.6. Replace the token key with what was returned at step 2.4 above
2.7. Replace the RECIPIENT_NUMBER with your own mobile number to test the SMS API.
2.8. Run as shown below.


pas@Pass-MBP:~/ibm/customers/telstra/telstra-apis/test$ ./sendsms.sh
{"messageId":"1370CAB677B59C226705337B95945CD6"}

Step 3 - Creating a REST based service to Call Telstra SMS API

At this point we can now Integrate the Telstra SMS API into Bluemix. To do that I created a simple Spring Boot Application which exposes a RESTful method to call Telstra SMS API using Spring's RestTemplate class. I do this as it's two calls you need to make to call the Telstra SMS API. A REST based call to get a ACCESS_TOKEN , then followed by a call to actually send an SMS message. Creating a Spring Boot application to achieve this allows me to wrap that into one single call making it easy to consume and add to the Bluemix Catalog as a Service.

More Information on The Cloud Integration service can be found here. Cloud Integration allows us to expose RESTful methods from Bluemix applications onto the catalog via one simple screen. We could alos use Bluemix API management service as well.

https://www.ng.bluemix.net/docs/services/CloudIntegration/index.html

Below shows the application being pushed into Bluemix which will then be used to add Telstra SMS API service into the Bluemix catalog.


pas@192-168-1-4:~/ibm/DemoProjects/spring-starter/jazzhub/TelstraSMSAPIDemo$ cf push
Using manifest file /Users/pas/ibm/DemoProjects/spring-starter/jazzhub/TelstraSMSAPIDemo/manifest.yml

Creating app pas-telstrasmsapi in org pasapi@au1.ibm.com / space apple as pasapi@au1.ibm.com...
OK

Using route pas-telstrasmsapi.mybluemix.net
Binding pas-telstrasmsapi.mybluemix.net to pas-telstrasmsapi...
OK

Uploading pas-telstrasmsapi...
Uploading app files from: /Users/pas/ibm/DemoProjects/spring-starter/jazzhub/TelstraSMSAPIDemo/target/TelstraSMSAPI-1.0-SNAPSHOT.jar
Uploading 752.3K, 98 files
Done uploading
OK

Starting app pas-telstrasmsapi in org pasapi@au1.ibm.com / space apple as pasapi@au1.ibm.com...
-----> Downloaded app package (15M)
-----> Liberty Buildpack Version: v1.19.1-20150622-1509
-----> Retrieving IBM 1.8.0_20150617 JRE (ibm-java-jre-8.0-1.0-pxa6480sr1ifx-20150617_03-cloud.tgz) ... (0.0s)
         Expanding JRE to .java ... (1.4s)
-----> Retrieving App Management 1.5.0_20150608-1243 (app-mgmt_v1.5-20150608-1243.zip) ... (0.0s)
         Expanding App Management to .app-management (0.9s)
-----> Downloading Auto Reconfiguration 1.7.0_RELEASE from https://download.run.pivotal.io/auto-reconfiguration/auto-reconfiguration-1.7.0_RELEASE.jar (0.1s)
-----> Liberty buildpack is done creating the droplet

-----> Uploading droplet (90M)

0 of 1 instances running, 1 starting
1 of 1 instances running

App started


OK

App pas-telstrasmsapi was started using this command `$PWD/.java/jre/bin/java -Xtune:virtualized -Xmx384M -Xdump:none -Xdump:heap:defaults:file=./../dumps/heapdump.%Y%m%d.%H%M%S.%pid.%seq.phd -Xdump:java:defaults:file=./../dumps/javacore.%Y%m%d.%H%M%S.%pid.%seq.txt -Xdump:snap:defaults:file=./../dumps/Snap.%Y%m%d.%H%M%S.%pid.%seq.trc -Xdump:heap+java+snap:events=user -Xdump:tool:events=systhrow,filter=java/lang/OutOfMemoryError,request=serial+exclusive,exec=./.buildpack-diagnostics/killjava.sh $JVM_ARGS org.springframework.boot.loader.JarLauncher --server.port=$PORT`

Showing health and status for app pas-telstrasmsapi in org pasapi@au1.ibm.com / space apple as pasapi@au1.ibm.com...
OK

requested state: started
instances: 1/1
usage: 512M x 1 instances
urls: pas-telstrasmsapi.mybluemix.net
last uploaded: Fri Jul 17 11:26:58 UTC 2015

     state     since                    cpu    memory           disk           details
#0   running   2015-07-17 09:28:28 PM   1.0%   150.6M of 512M   148.9M of 1G

Step 4 - Add the RESTful method to IBM Bluemix catalog to invoke the Telstra SMS API

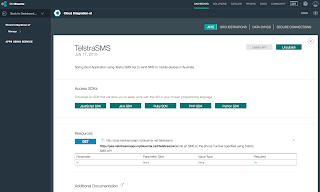
4.1 To expose our RESTful method we simply define the end point using the Cloud Integration service as shown below.


The image showing the Cloud Integration service with the Telstra API exposed and available to be consumed as a Service on Bluemix.


This was created using the Bluemix Dashboard but can also be done using the Cloud Foundry command line "cf create-service ..."

Step 5 - Create a Application client which will invoke the Telstra SMS service

At this point we are going to push a client application onto Bluemix which consumes the Telstra SMS API service and then uses it within the application. WE do this to verify the service works creating a simple HTML based application which invokes the service which has a manifest.yml file indicating it wants to consume the service which is now exposed on the catalog within Bluemix as per above.

5.1. The manifest.yml consumes the service created from the API in the catalog


applications:
- name: pas-telstrasmsapi-client
  memory: 512M
  instances: 1
  host: pas-telstrasmsapi-client
  domain: mybluemix.net
  path: ./target/TelstraSMSApiClient-0.0.1-SNAPSHOT.jar
  env:
   JBP_CONFIG_IBMJDK: "version: 1.8.+"
  services:
    - TelstraSMS-service

5.2. Push the application as shown below.


pas@Pass-MacBook-Pro:~/ibm/DemoProjects/spring-starter/jazzhub/TelstraSMSApiClient$ cf push
Using manifest file /Users/pas/ibm/DemoProjects/spring-starter/jazzhub/TelstraSMSApiClient/manifest.yml

Updating app pas-telstrasmsapi-client in org pasapi@au1.ibm.com / space apple as pasapi@au1.ibm.com...
OK

Using route pas-telstrasmsapi-client.mybluemix.net
Uploading pas-telstrasmsapi-client...
Uploading app files from: /Users/pas/ibm/DemoProjects/spring-starter/jazzhub/TelstraSMSApiClient/target/TelstraSMSApiClient-0.0.1-SNAPSHOT.jar
Uploading 806.8K, 121 files
Done uploading
OK
Binding service TelstraSMS-service to app pas-telstrasmsapi-client in org pasapi@au1.ibm.com / space apple as pasapi@au1.ibm.com...
OK

Stopping app pas-telstrasmsapi-client in org pasapi@au1.ibm.com / space apple as pasapi@au1.ibm.com...
OK

Starting app pas-telstrasmsapi-client in org pasapi@au1.ibm.com / space apple as pasapi@au1.ibm.com...
-----> Downloaded app package (16M)
-----> Downloaded app buildpack cache (1.2M)
-----> Liberty Buildpack Version: v1.19.1-20150622-1509
-----> Retrieving IBM 1.8.0_20150617 JRE (ibm-java-jre-8.0-1.0-pxa6480sr1ifx-20150617_03-cloud.tgz) ... (0.0s)
         Expanding JRE to .java ... (1.5s)
-----> Retrieving App Management 1.5.0_20150608-1243 (app-mgmt_v1.5-20150608-1243.zip) ... (0.0s)
         Expanding App Management to .app-management (0.9s)
-----> Downloading Auto Reconfiguration 1.7.0_RELEASE from https://download.run.pivotal.io/auto-reconfiguration/auto-reconfiguration-1.7.0_RELEASE.jar (0.0s)
-----> Liberty buildpack is done creating the droplet

-----> Uploading droplet (90M)

0 of 1 instances running, 1 starting
1 of 1 instances running

App started


OK

App pas-telstrasmsapi-client was started using this command `$PWD/.java/jre/bin/java -Xtune:virtualized -Xmx384M -Xdump:none -Xdump:heap:defaults:file=./../dumps/heapdump.%Y%m%d.%H%M%S.%pid.%seq.phd -Xdump:java:defaults:file=./../dumps/javacore.%Y%m%d.%H%M%S.%pid.%seq.txt -Xdump:snap:defaults:file=./../dumps/Snap.%Y%m%d.%H%M%S.%pid.%seq.trc -Xdump:heap+java+snap:events=user -Xdump:tool:events=systhrow,filter=java/lang/OutOfMemoryError,request=serial+exclusive,exec=./.buildpack-diagnostics/killjava.sh $JVM_ARGS org.springframework.boot.loader.JarLauncher --server.port=$PORT`

Showing health and status for app pas-telstrasmsapi-client in org pasapi@au1.ibm.com / space apple as pasapi@au1.ibm.com...
OK

requested state: started
instances: 1/1
usage: 512M x 1 instances
urls: pas-telstrasmsapi-client.mybluemix.net
last uploaded: Sun Jul 19 15:22:26 UTC 2015

     state     since                    cpu    memory           disk           details
#0   running   2015-07-19 11:23:57 PM   0.8%   144.9M of 512M   149.8M of 1G


Step 6 - Send SMS using Telstra SMS Api from Bluemix Application using the Service

6.1. Navigate to the URL below and send an SMS using the form below.

http://pas-telstrasmsapi-client.mybluemix.net/


6.2. Verify it has sent a message to the phone number entered in the text field as shown below.


More Information 

Getting started with Bluemix is easy, navigate to http://bluemix.net to sign up and get going.

Saturday 15 August 2015

IntelliJ IDEA 14.1.4 adds Spring Initializr

Just upgraded to to Intellij IDEA 14.1.4 and found that the Spring Initializr web page for quickly creating spring boot applications has been added to the New Project dialog. The web site I normally drive new spring boot applications from as follows, is now part of IntelliJ IDEA which is great.

http://start.spring.io/

Some screen shots of this.


Monday 10 August 2015

IBM Bluemix Garage New Website

If you keen to know more about the IBM Bluemix garage which is also coming to melbourne shortly this URL is the main page for that. Some good videos here detailing what the Garage stands for.

https://www.ibm.com/cloud-computing/bluemix/garage/

Tuesday 4 August 2015

Using a Tomcat provided buildpack in Bluemix

By default if you push a java application into public Bluemix you will use the Liberty java buildpack. If you want to use tomcat you can do that as follows.

1. Show the buildpacks available as follows

> cf buildpacks

2. The buildpack which uses Tomcat is as follows

java_buildpack

3. Specify you would like to use the buildpack as shown below when using

cf push pas-props -d mybluemix.net -i 1 -m 256M -b java_buildpack -p props.war

Example:

pas@Pass-MacBook-Pro-2:~/bluemix-apps/simple-java$ cf push pas-props -d mybluemix.net -i 1 -m 256M -b java_buildpack -p props.war
Creating app pas-props in org pasapi@au1.ibm.com / space dev as pasapi@au1.ibm.com...
OK

Creating route pas-props.mybluemix.net...
OK

Binding pas-props.mybluemix.net to pas-props...
OK

Uploading pas-props...
Uploading app files from: props.war
Uploading 2.9K, 6 files
Done uploading
OK

Starting app pas-props in org pasapi@au1.ibm.com / space dev as pasapi@au1.ibm.com...
-----> Downloaded app package (4.0K)
-----> Java Buildpack Version: v3.0 | https://github.com/cloudfoundry/java-buildpack.git#3bd15e1
-----> Downloading Open Jdk JRE 1.8.0_51 from https://download.run.pivotal.io/openjdk/lucid/x86_64/openjdk-1.8.0_51.tar.gz (11.6s)
       Expanding Open Jdk JRE to .java-buildpack/open_jdk_jre (1.2s)
-----> Downloading Tomcat Instance 8.0.24 from https://download.run.pivotal.io/tomcat/tomcat-8.0.24.tar.gz (2.4s)
       Expanding Tomcat to .java-buildpack/tomcat (0.1s)
-----> Downloading Tomcat Lifecycle Support 2.4.0_RELEASE from https://download.run.pivotal.io/tomcat-lifecycle-support/tomcat-lifecycle-support-2.4.0_RELEASE.jar (0.1s)
-----> Downloading Tomcat Logging Support 2.4.0_RELEASE from https://download.run.pivotal.io/tomcat-logging-support/tomcat-logging-support-2.4.0_RELEASE.jar (0.4s)
-----> Downloading Tomcat Access Logging Support 2.4.0_RELEASE from https://download.run.pivotal.io/tomcat-access-logging-support/tomcat-access-logging-support-2.4.0_RELEASE.jar (0.4s)

-----> Uploading droplet (50M)

0 of 1 instances running, 1 starting
1 of 1 instances running

App started


OK

App pas-props was started using this command `JAVA_HOME=$PWD/.java-buildpack/open_jdk_jre JAVA_OPTS="-Djava.io.tmpdir=$TMPDIR -XX:OnOutOfMemoryError=$PWD/.java-buildpack/open_jdk_jre/bin/killjava.sh -Xmx160M -Xms160M -XX:MaxMetaspaceSize=64M -XX:MetaspaceSize=64M -Xss853K -Daccess.logging.enabled=false -Dhttp.port=$PORT" $PWD/.java-buildpack/tomcat/bin/catalina.sh run`

Showing health and status for app pas-props in org pasapi@au1.ibm.com / space dev as pasapi@au1.ibm.com...
OK

requested state: started
instances: 1/1
usage: 256M x 1 instances
urls: pas-props.mybluemix.net
last uploaded: Mon Aug 3 21:40:36 UTC 2015

     state     since                    cpu    memory           disk           details
#0   running   2015-08-03 02:41:47 PM   0.0%   136.7M of 256M   125.7M of 1G

Friday 17 July 2015

Using JRE 1.8 for the Liberty Buildpack in Bluemix

The latest Liberty biuldpack update now adds the ability to switch to JRE 1.8 runtime. Given I am now switching to JDK 1.8 for all my projects this has come in very handy, and of course Spring Boot favors JDK 1.8 as well. The default is still JRE 1.7 so to switch to 1.8 set an ENV variable as follows in your manifest.yml as shown below.

manifest.yml

applications:
- name: pas-myapp
  memory: 512M
  instances: 1
  host: pas-myapp
  domain: mybluemix.net
  path: ./target/myapp-1.0-SNAPSHOT.jar
  env:
   JBP_CONFIG_IBMJDK: "version: 1.8.+"


More Information

https://developer.ibm.com/bluemix/2015/05/05/liberty-buildpack-updates-java-8-java-ee-7-updates/

Wednesday 10 June 2015

Bluemix - Adding a Spring Boot application to IBM Bluemix DevOps project

I have a few Spring Boot applications which I would like to add to my IBM DevOps Jazzhub projects. The following shows how to do this.

Note: It's assumed you have the following to do this.
  • Jazzhub DevOps account. https://hub.jazz.net/
  • Existing Spring Boot application project
  • Git client installed
1. Log into Jazz Hub using the URL below.

https://hub.jazz.net/

2. Create a new project using the "+ Create Project" button


3. Call it BluemixSpringBootJPA, of course you can call your project whatever you like.

4. Click the "Create a New Repository"


5. Select "Create a Git Repo on Bluemix"


Now go to the file system where your project exists and start the process to add it to GIT locally
and finally push it to the remote git url we created above

pas@pass-mbp:~/ibm/DemoProjects/spring-starter/jazzhub/BluemixSpringBootJPA$ git init
Initialized empty Git repository in /Users/pas/ibm/DemoProjects/spring-starter/jazzhub/BluemixSpringBootJPA/.git/

pas@pass-mbp:~/ibm/DemoProjects/spring-starter/jazzhub/BluemixSpringBootJPA$ git add .

pas@pass-mbp:~/ibm/DemoProjects/spring-starter/jazzhub/BluemixSpringBootJPA$ git commit -m 'First commit'
[master (root-commit) 332755e] First commit
 35 files changed, 866 insertions(+)
 create mode 100644 README.md
 create mode 100644 manifest.yml
 create mode 100644 pom.xml
 create mode 100644 src/main/java/pas/cloud/webapp/ApplesCfDemoApplication.java
 create mode 100644 src/main/java/pas/cloud/webapp/DataSourceConfiguration.java
 create mode 100644 src/main/java/pas/cloud/webapp/controllers/AlbumController.java
 create mode 100644 src/main/java/pas/cloud/webapp/controllers/WelcomeController.java
 create mode 100644 src/main/java/pas/cloud/webapp/domain/Album.java
 create mode 100644 src/main/java/pas/cloud/webapp/domain/ApplicationInfo.java
 create mode 100644 src/main/java/pas/cloud/webapp/domain/RandomIdGenerator.java
 create mode 100644 src/main/java/pas/cloud/webapp/repositories/JpaAlbumRepository.java
 create mode 100644 src/main/resources/application.properties
 create mode 100644 src/main/resources/data.sql
 create mode 100644 src/main/resources/messages_en.properties
 create mode 100644 src/main/resources/static/images/Create.png
 create mode 100755 src/main/resources/static/images/Execute.png
 create mode 100644 src/main/resources/static/images/PoweredByPivotal1.png
 create mode 100755 src/main/resources/static/images/Search.png
 create mode 100755 src/main/resources/static/images/add16.gif
 create mode 100755 src/main/resources/static/images/b_drop.png
 create mode 100644 src/main/resources/static/images/b_home.png
 create mode 100644 src/main/resources/static/images/b_props.png
 create mode 100755 src/main/resources/static/images/key.png
 create mode 100755 src/main/resources/static/images/s_error.png
 create mode 100755 src/main/resources/static/images/s_info.png
 create mode 100755 src/main/resources/static/images/s_notice.png
 create mode 100755 src/main/resources/static/images/s_success.png
 create mode 100644 src/main/resources/static/images/s_tbl.png
 create mode 100644 src/main/resources/templates/albums.html
 create mode 100644 src/main/resources/templates/editalbum.html
 create mode 100644 src/main/resources/templates/error.html
 create mode 100644 src/main/resources/templates/footer.html
 create mode 100644 src/main/resources/templates/newalbum.html
 create mode 100644 src/main/resources/templates/welcome.html
 create mode 100644 src/test/java/pas/cloud/webapp/ApplesCfDemoApplicationTests.java

pas@pass-mbp:~/ibm/DemoProjects/spring-starter/jazzhub/BluemixSpringBootJPA$ git remote add origin https://hub.jazz.net/git/pasapples/BluemixSpringBootJPA

pas@pass-mbp:~/ibm/DemoProjects/spring-starter/jazzhub/BluemixSpringBootJPA$ git remote -v
origin    https://hub.jazz.net/git/pasapples/BluemixSpringBootJPA (fetch)
origin    https://hub.jazz.net/git/pasapples/BluemixSpringBootJPA (push)

pas@pass-mbp:~/ibm/DemoProjects/spring-starter/jazzhub/BluemixSpringBootJPA$ git commit -m 'Update READEME.md'
[master 5c32ea7] Update READEME.md
pas@pass-mbp:~/ibm/DemoProjects/spring-starter/jazzhub/BluemixSpringBootJPA$ git push origin master
Username for 'https://hub.jazz.net': pasapples
Password for 'https://pasapples@hub.jazz.net':
Counting objects: 58, done.
Delta compression using up to 8 threads.
Compressing objects: 100% (49/49), done.
Writing objects: 100% (58/58), 32.88 KiB | 0 bytes/s, done.
Total 58 (delta 6), reused 0 (delta 0)
remote: Resolving deltas: 100% (6/6)
remote:
remote: Processing changes: refs: 1, done
To https://hub.jazz.net/git/pasapples/BluemixSpringBootJPA
   8bcea42..5c32ea7  master -> master
pas@pass-mbp:~/ibm/DemoProjects/spring-starter/jazzhub/BluemixSpringBootJPA$


Finally the project exists in Jazzhub and can be forked as required


So if you wanted to fork this project here is the URL to it.

https://hub.jazz.net/project/pasapples/BluemixSpringBootJPA/overview

More Information

For more information on the IBM dev ops service use the link below.

https://hub.jazz.net/tutorials/devopsweb/

Friday 15 May 2015

ASP.NET 5 IBM Bluemix Demo

The following demo is using the same code IBM Bluemix created when using the Experimental ASP .NET 5 runtime. This can be done using the CF CLI where we clone the project from jazzhub git repository.


Steps

1. Clone a sample project as follows

pas@Pass-MacBook-Pro:~/bluemix-apps/DOTNET$ git clone https://hub.jazz.net/git/pasapples/pas-donet-demo.git
Cloning into 'pas-donet-demo'...
remote: Counting objects: 24, done
remote: Finding sources: 100% (24/24)
remote: Total 24 (delta 0), reused 24 (delta 0)
Unpacking objects: 100% (24/24), done.
Checking connectivity... done.


2. cd pas-donet-demo

3. Edit manifest.yml to use a unique host name

applications:
- disk_quota: 1024M
  host: pas-donet-demo
  name: pas-donet-demo
  path: .
  domain: mybluemix.net
  instances: 1
  memory: 256M


4. Deploy as follows

pas@Pass-MacBook-Pro:~/bluemix-apps/DOTNET/pas-donet-demo$ cf push -f manifest.yml
Using manifest file manifest.yml

Creating app pas-donet-demo in org pasapi@au1.ibm.com / space dev as pasapi@au1.ibm.com...
OK

Creating route pas-donet-demo.mybluemix.net...
OK

Binding pas-donet-demo.mybluemix.net to pas-donet-demo...
OK

Uploading pas-donet-demo...
Uploading app files from: .
Uploading 19.9K, 15 files
Done uploading
OK

Starting app pas-donet-demo in org pasapi@au1.ibm.com / space dev as pasapi@au1.ibm.com...
-----> Downloaded app package (20K)

  ************************************************************************
  * WARNING: This is an experimental buildpack. It is not supported.     *
  *          Do not expect it to work reliably. Please, do not           *
  *          contact support about issues with this buildpack.           *
  ************************************************************************
.
-----> Extracting mono
Using mono mono-lucid64-3.12.1.tar.gz
       OK
-----> Adding Nowin.vNext
       Copied 3 files from /var/vcap/data/dea_next/admin_buildpacks/2b638599-b3da-44e9-86f0-6b2f513daa4f_87e6c7503171fc3d6db9055873938657ca3ea6c6/resources/Nowin.vNext to /tmp/staged/app/src
       OK


....

       Total time 361ms
       OK
-----> Moving files in to place
       Copied 1865 files from /app/mono to /tmp/staged/app
       OK
-----> Saving to buildpack cache
       Copied 628 files from /tmp/staged/app/.k to /tmp/cache
       OK
-----> Writing Release YML
       OK

-----> Uploading droplet (136M)

0 of 1 instances running, 1 starting
1 of 1 instances running

App started


OK

App pas-donet-demo was started using this command `cd src/samplemvc; sleep 999999 | k cf-web`

Showing health and status for app pas-donet-demo in org pasapi@au1.ibm.com / space dev as pasapi@au1.ibm.com...
OK

requested state: started
instances: 1/1
usage: 256M x 1 instances
urls: pas-donet-demo.mybluemix.net
last uploaded: Fri May 15 11:38:29 UTC 2015

     state     since                    cpu    memory           disk           details
#0   running   2015-05-15 09:40:30 PM   0.1%   168.9M of 256M   369.8M of 1G


5. Finally access the application using the route as shown below.

eg: http://pas-donet-demo.mybluemix.net


Friday 8 May 2015

Accessing your Cloud Integration API end point from Javascript

I previously created a Cloud Integration endpoint using a Bluemix Application Itself. The application was a Sprint Boot application exposing a single REST endpoint. The screen shots below show what has been added to the Catalog as private API's in my organization. The demo below shows how to access the API using a Javascript client in this case NodeJS from the command line.


Here is how we can access that API using a Javascript SDK which we can download from the Cloud Integration service itself.

1. Click on the "Cloud Integration" service itself
2. Select your API endpoint
3. Under "Access SDK's" select "Javascript SDK" and unzip it onto your file system

Note: We will use NodeJS to run this code

4. Install the required packages using the following command

> npm install

5. Ensure you import the API module as follows , as we are not using NPM for the API itself. The code is commented out so simply add it back in and change the reference to use "sdk"

// Alternatively, if you are not using npm, then import the API class module.
var sdk = require('./lib/SpringBootHelloWorldAPI.js');
console.log("Imported API class module ok");


6. The full code is as follows which enables us to display the function call output within the method itself. There are many ways to do this but just so we invoke it this is good enough.

  
// Import the SDK package.
//var sdk = require('SpringBootHelloWorldAPI');

// Alternatively, if you are not using npm, then import the API class module.
var sdk = require('./lib/SpringBootHelloWorldAPI.js');
console.log("Imported API class module ok");

// Create a new instance of the API class.
var api = new sdk.SpringBootHelloWorldAPI();

// Set the API credentials.
// TODO: replace username and password with those from the API definition.
//api.setAPICredentials('username', 'password'); // The API credentials are optional.

// Example for the HelloWorldService operation.
function example_HelloWorldService() {

 // Set up the request parameters for the HelloWorldService operation.
 var request = {};

        console.log("About to call service method");

 // Invoke the HelloWorldService operation.
 api.HelloWorldService(request, function (error, callback) {

  // Handle any errors from the HelloWorldService operation.
  if (error) {
   console.log(error);
   throw error;
  }

                func_result = callback;
                console.log(func_result);

 });

}

example_HelloWorldService();

7. Edit ./lib/SpringBootHelloWorldAPI.js and change the final line of JavaScript code to be as follows

module.exports.SpringBootHelloWorldAPI = SpringBootHelloWorldAPI;

8. Finally call the API using the Javascript client as follows
 
pas@Pass-MacBook-Pro:~/bluemix-apps/cloud-integration/client-api/springboot-hello/javascript$ node example.js
Imported API class module ok
About to call service method
{ id: 48, content: 'Hello, World!' }


Tuesday 28 April 2015

Auto Scaling Service within Bluemix

I decided to test out the Auto Scale service in IBM Bluemix following this example which shows how to also use the Blazemeter service to Load test the application to simulate extra memory requirement on the application.

https://developer.ibm.com/bluemix/2015/04/03/handle-unexpected-bluemix-auto-scaling/

The demo is quite straight forward to setup and the screen shots below show what the service output gives in terms of auto scaling history and of course metric statistics for the selected policy configuration.

Policy Configuration


Metrics Statistics


Scaling History